The following is a tutorial on CD ripping using the software and preferences used in my archiving workflow.
This guide assumes that you intend to rip audio to lossless formats with checks and logs. My preference is FLAC, which will be used as the primary example here.
It also assumes you are using MacOS as your operating system. If you want to rip audio using a PC, I would recommend Exact Audio Copy (EAC). Hydrogenaudio has a guide for configuring that software.
X Lossless Decoder (XLD)
X Lossless Decoder (henceforth referred to as XLD) is a tool for MacOS that is able to decode/convert/play various 'lossless' audio files. It works on Mac OS X 10.4 and later.
You can begin the setup process by downloading XLD from the developer (mirror 1, mirror 2). Once you’ve installed XLD on your system, continue on to the configuration steps below
Step 1. General Preferences
When opening XLD for the first time, the application will automatically open to the general preferences pane. If it does not, you can access this by navigating to the XLD dropdown in your menu bar and clicking “Preferences” or using the ⌘, shortcut.
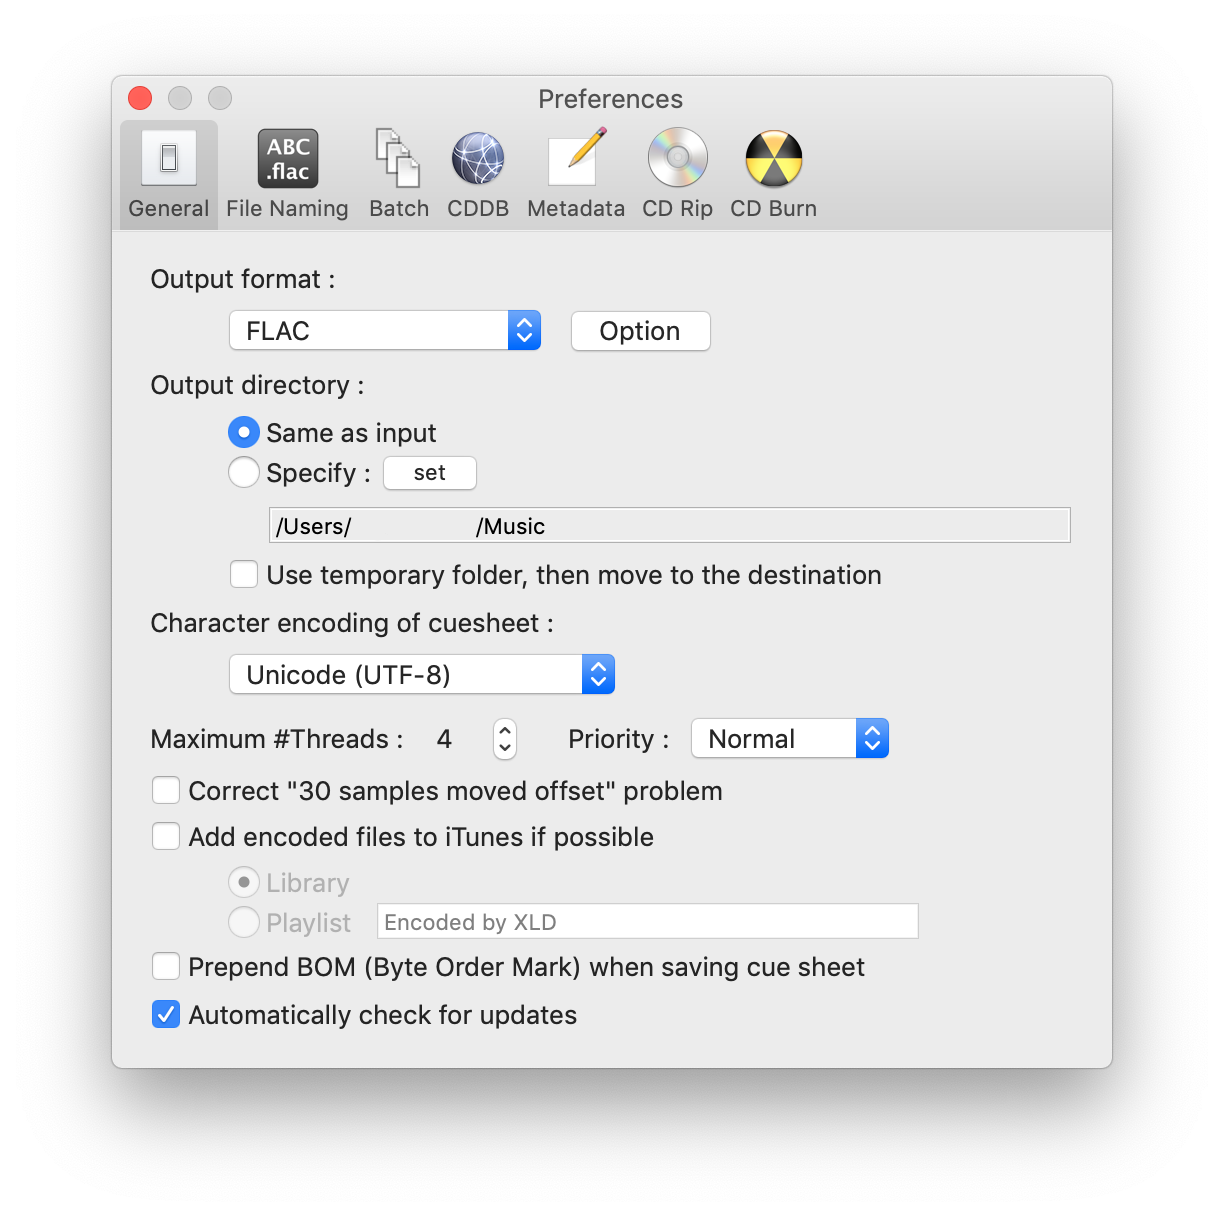
The only action you need to take here is changing your output format to FLAC and your character encoding of cuesheet to Unicode (UTF-8).
If you wish to specify a folder for your output, you can do so. Otherwise, XLD will prompt you for an output folder at the beginning of each rip. Your computer should automatically set the threading settings based on the processor you have on board.
Leave the automatic updates box checked.
Step 2. Output Format
After setting your output format to FLAC, click on the option button to the right.
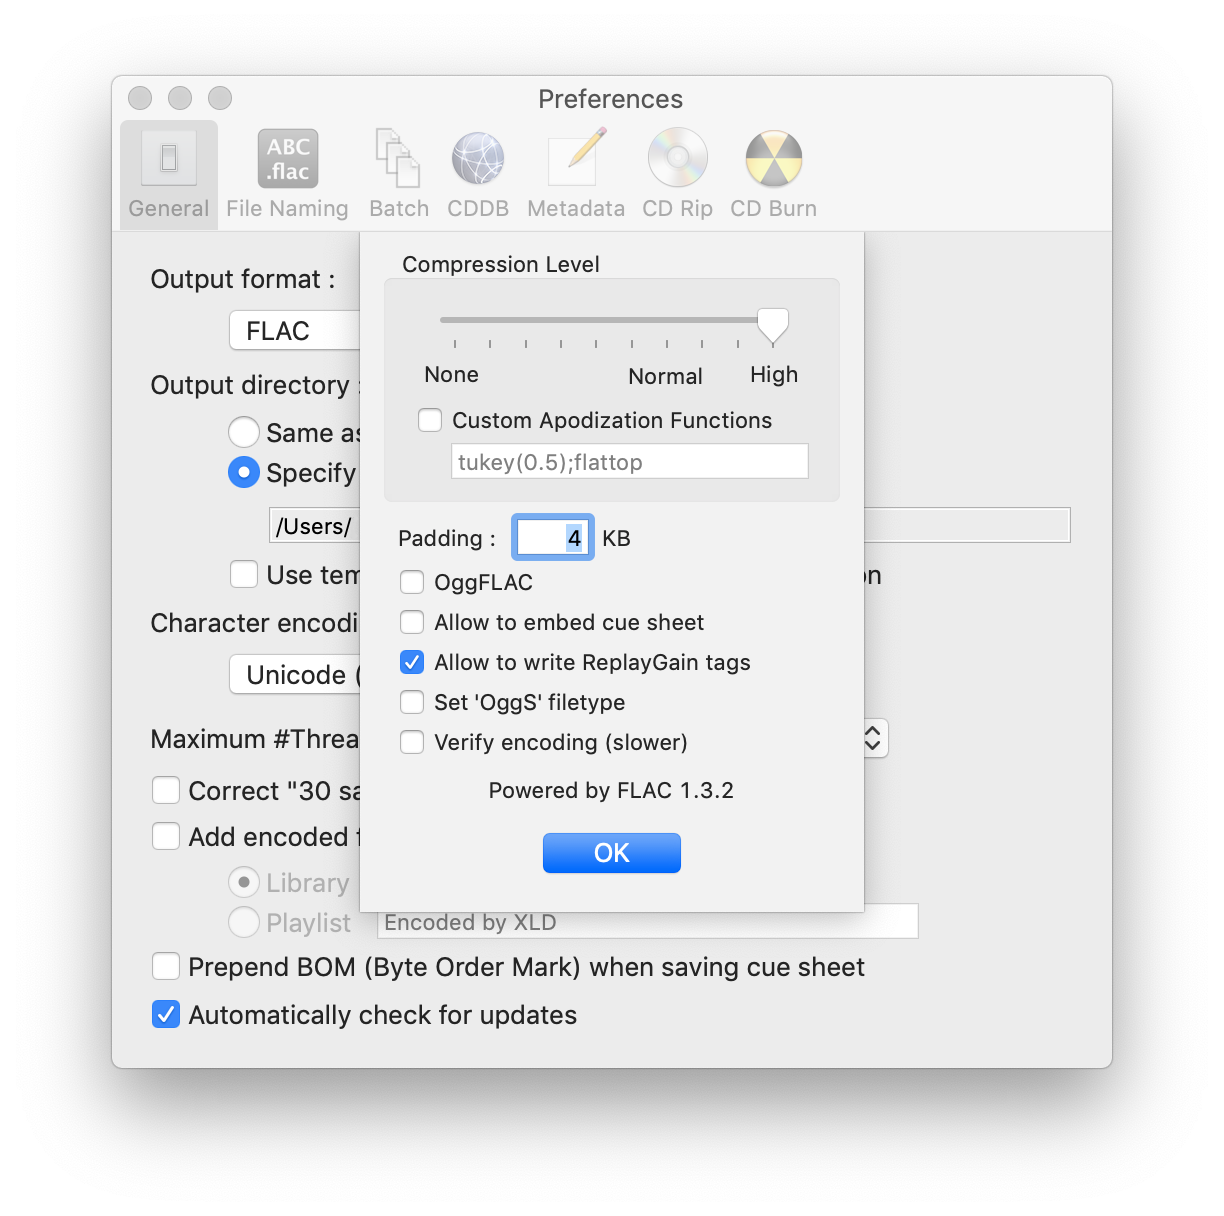
In this section, move the compression level slider to High and uncheck the box that allows XLD to embed a cue sheet. You can leave this setting on if you want to rip a full disc to a single file.'
Step 3. File Naming
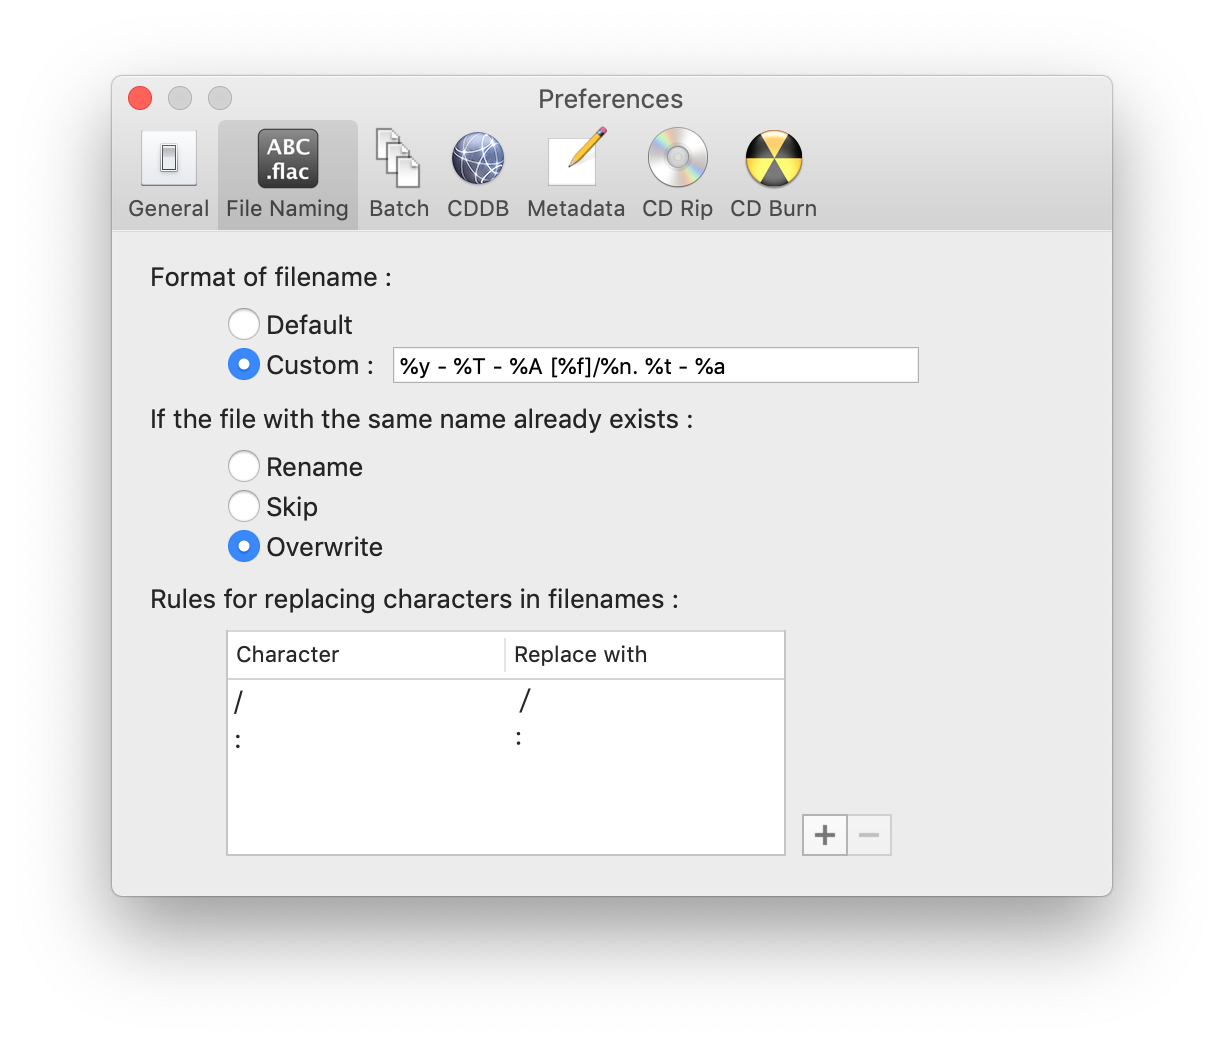
The next step is to set pre-formatted templates for your file output. Naming conventions vary, but I suggest that each track have, at the very least, the track number, track title, and artist’s name.
Forward slashes ( / ) are translated into new directories. Everything preceding the slash is the folder name and everything following it is the track name.
This is the template I use and an example filepath of the output
%y - %T - %A [%f]/%n. %t - %a
2014 - Cult - Bayside [FLAC]/1. Big Cheese - Bayside
You can use the key to your left to format based on your own preferences. More, less commonly used placeholders can be found here.
Select “Overwrite” as the option for existing file names.
Key:
%D = disc number
%I = disc id
%A = album artist
%T = album title
%a = track artist
%c = composer
%f = format
%g = genre
%n = track number
%t = track title
%y = year
Step 4. Batch Conversion
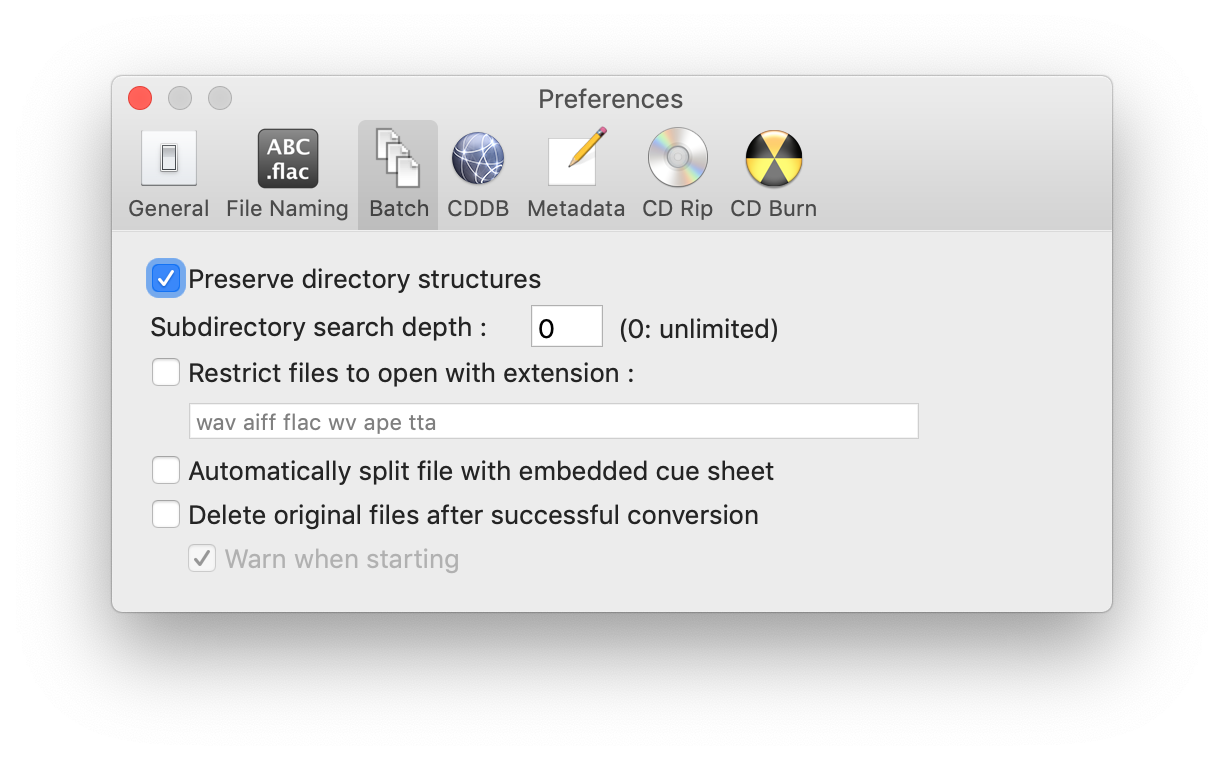
While not necessary to configure for individual CD rips, the batch conversion tab holds settings useful if you need to convert numerous files across numerous subdirectories in one go.
For instance, if you have an artist-level directory containing two album directories, you could drag the artist’s folder onto the XLD icon in the menu bar and begin a batch conversion.
Ensure that “Preserve directory structures” is checked and that your subdirectory search depth is 0.
Step 5. Metadata
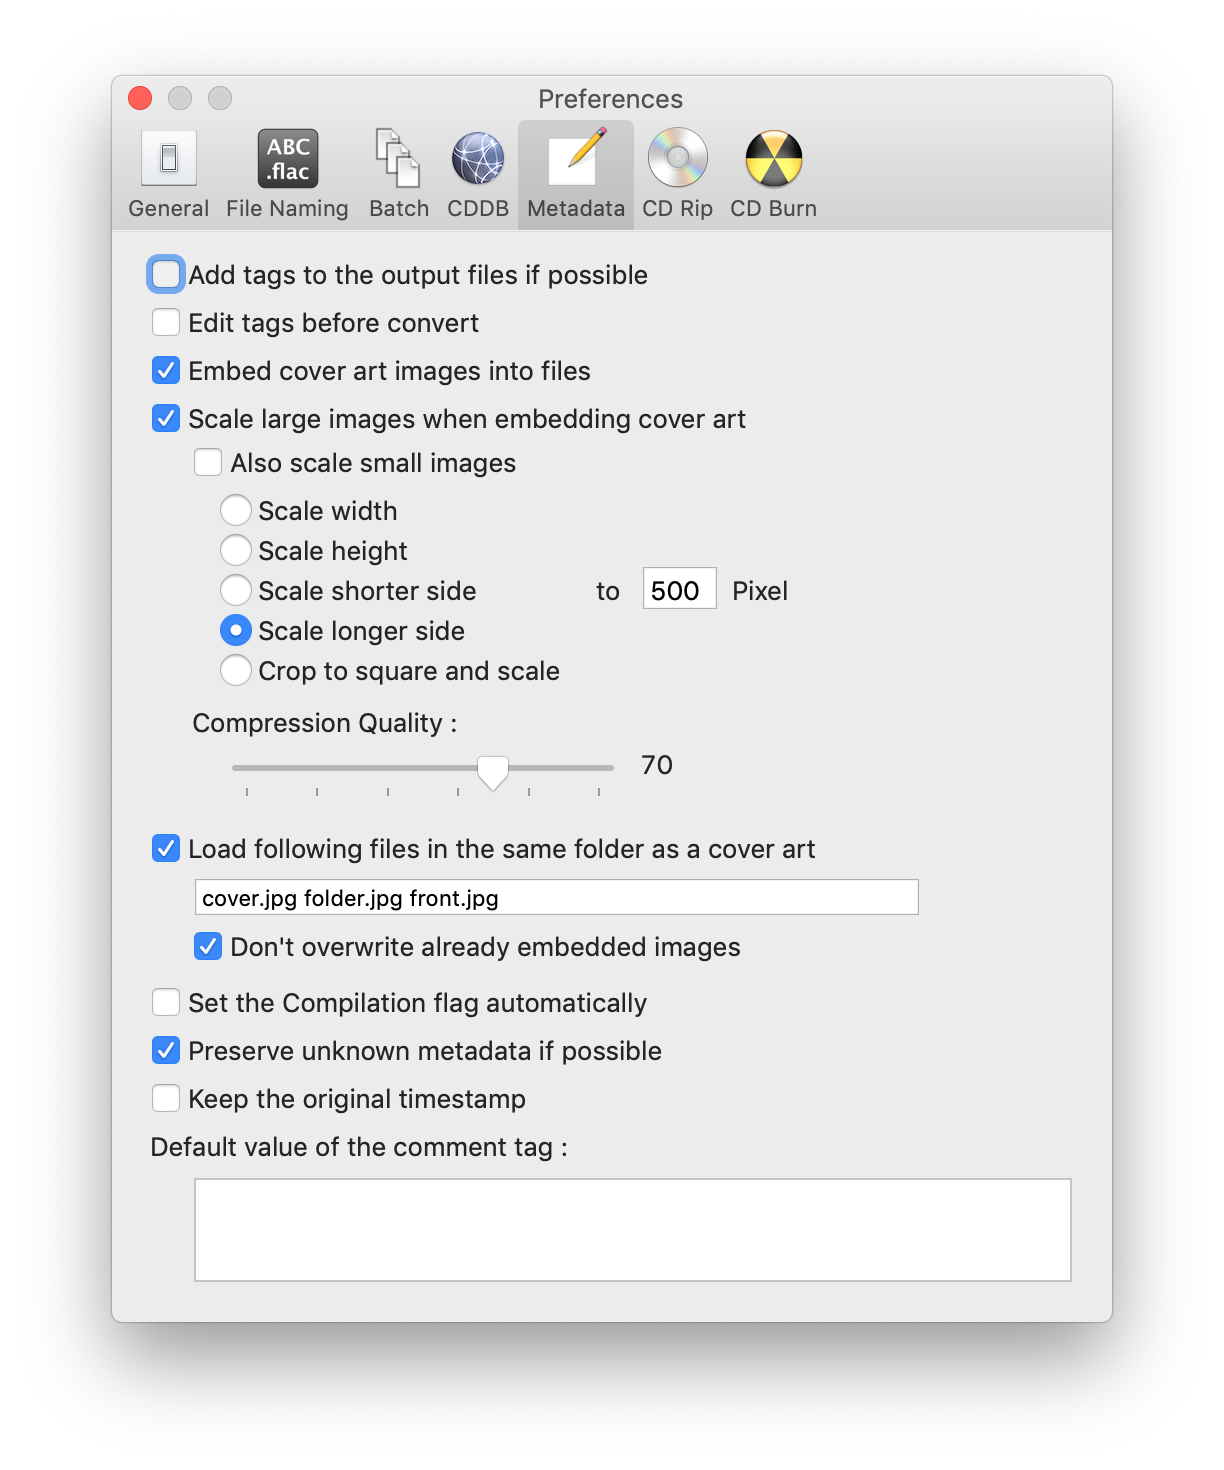
Skipping over the CDDB panel, we’ll verify that your default metadata settings are configured correctly.
Depending on your storage and playback needs, there are options here that can save you space in the aggregate. If you leave “Embed cover art images into files,” XLD will use the image data it obtains from CDDB/MusicBrainz to populate the cover field for each ripped or converted track. This is less than necessary on platforms where your media player of choice displays artwork from a separate file located in the same directory.
If you’d like to review the metadata being used before each conversion, check “Edit tags before conversion.”
Uncheck the automatic compilation flag setting and decide if you’d like to leave a default comment on each track. This could be something like “Converted with X Lossless Decoder” or “visit discography.fm.”
Step 6. CD Ripping
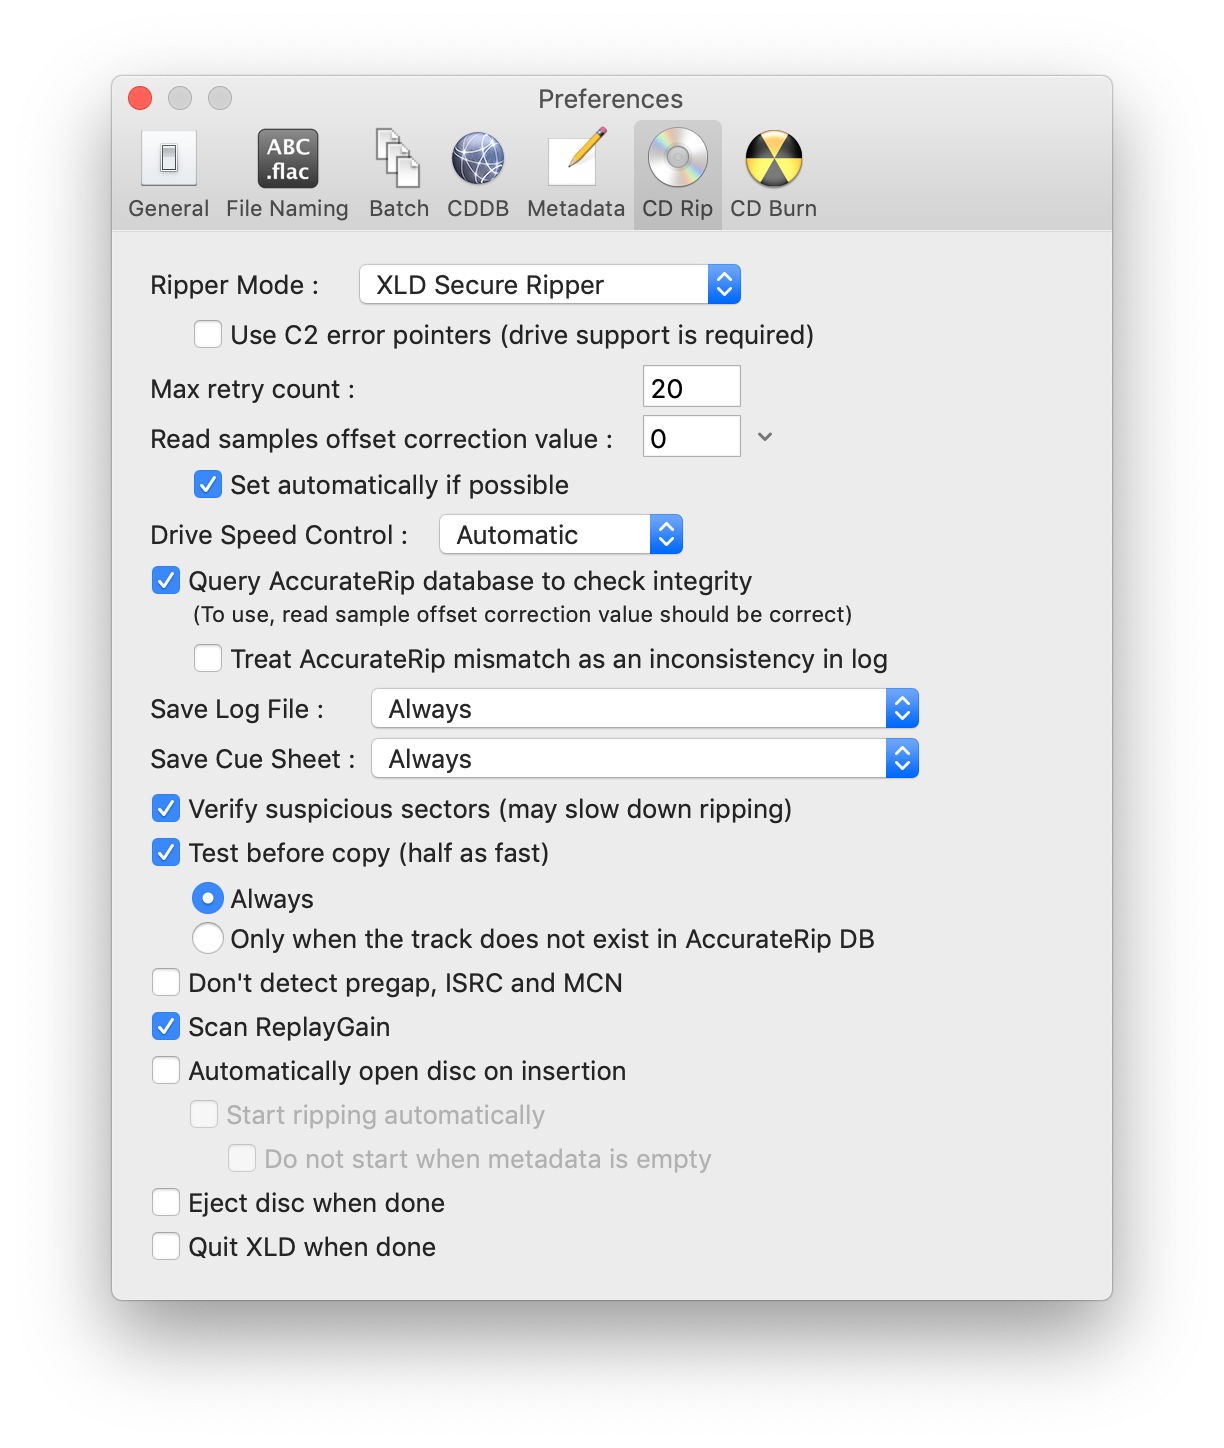
In terms of the quality and documentation of the media being ripped, this is the most important configuration panel of them all. If you want to obtain an exact replica of the files on disc, make sure that these are set precisely to the image above.
The ripper should be in XLD Secure mode. You can change this via the first dropdown in the panel.
Your sample read settings should be set by XLD automatically. Do not change these, but do restart XLD if you swap out an external disc drive. You can verify that your current drive is recognized by XLD via the downward facing chevron to the right of your read sample offset value.
Leave your AccurateRip settings as is. This will check a database of existing rips to ensure that yours is accurate.
Always save both the log file and cue sheet. These are records account for the quality of your rip. You will also want to verify suspicious sectors. I’ll explain why in the plugins section.
It’s important to test before copy. This essentially tells XLD to read each track twice, double checking them for inconsistencies and saving the best possible rip. This will double the time it takes for your rips to take place, but will ensure the best copy. I always test before copy, but you can save time and drive rotations by skipping this when the track exists in the AccurateRip database.
Lastly, check the “Scan ReplayGain” checkbox. This adds information to your logs that may help identify the edition of your disc. It doesn’t hurt to leave this on.
Step 7. Profiles & Multiple Formats
This step is optional, but may be useful if you intend to rip/convert to different formats or multiple formats at one time.
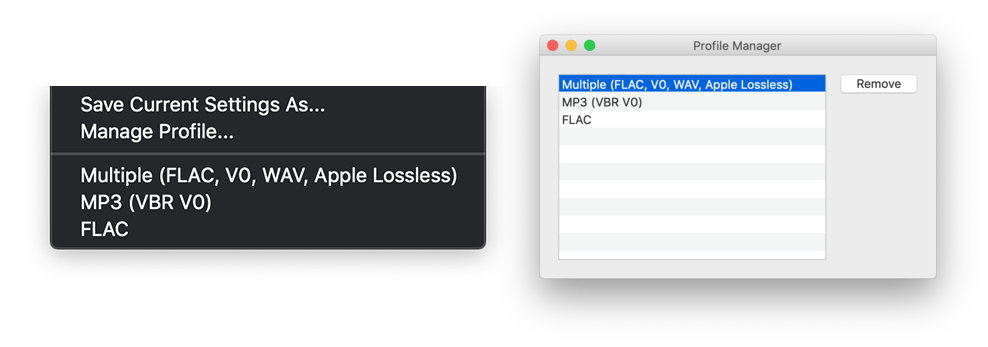
First, you’ll want to save your current settings. Do this via the Profile menu in the menu bar. Use an identifiable description that includes the type of file you are outputting. Now you are free to change any of your settings from steps 1-6, saving them as a different profile that you can switch to quickly.
Most will use this feature to set up different output settings like VBR MP3s or WAV files, but you can use it to set up profiles that will rip faster for occasions that don’t require the utmost quality.
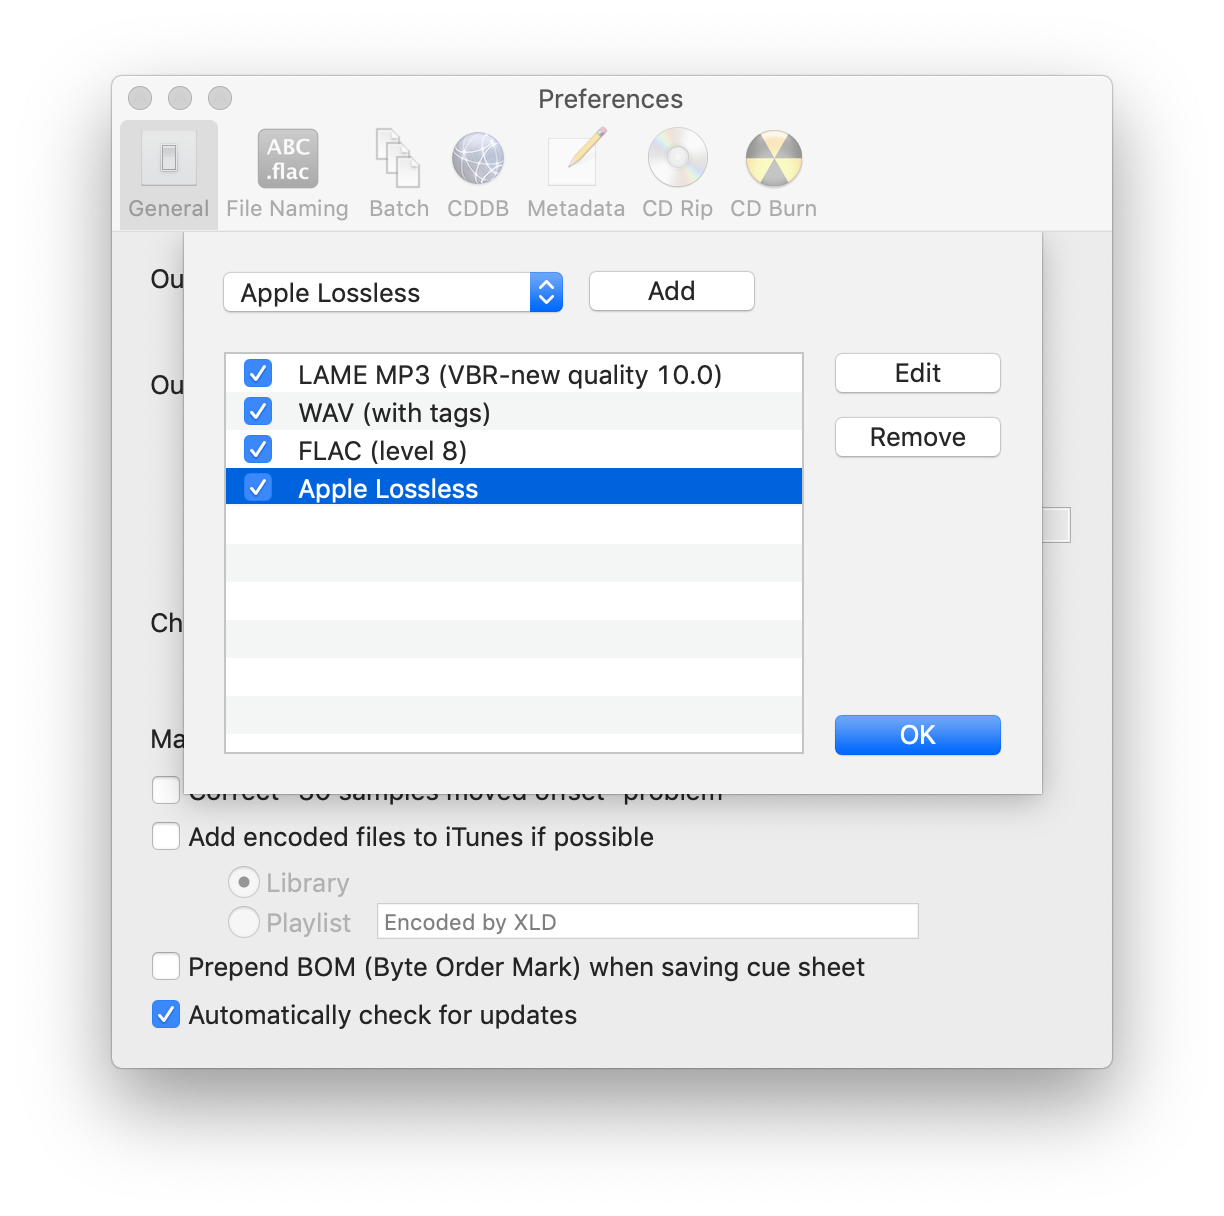
You can also set up a profile that will output converted media in various formats at once. You can set this up my choosing Multiple Formats from the “Output format” dropdown on the General tab. Click options and generate a list of your desired formats and settings for each. AIFF is included by default, but can be removed after more settings are added. Changing the names of these formats will change the value of %f in your file names. This is helpful when ripping to MP3 in various qualities V0, V2, 320 CBR, etc.
When any changes are made, be sure to save or overwrite your profiles using the same steps as your first.
Step 8. Let’r Rip
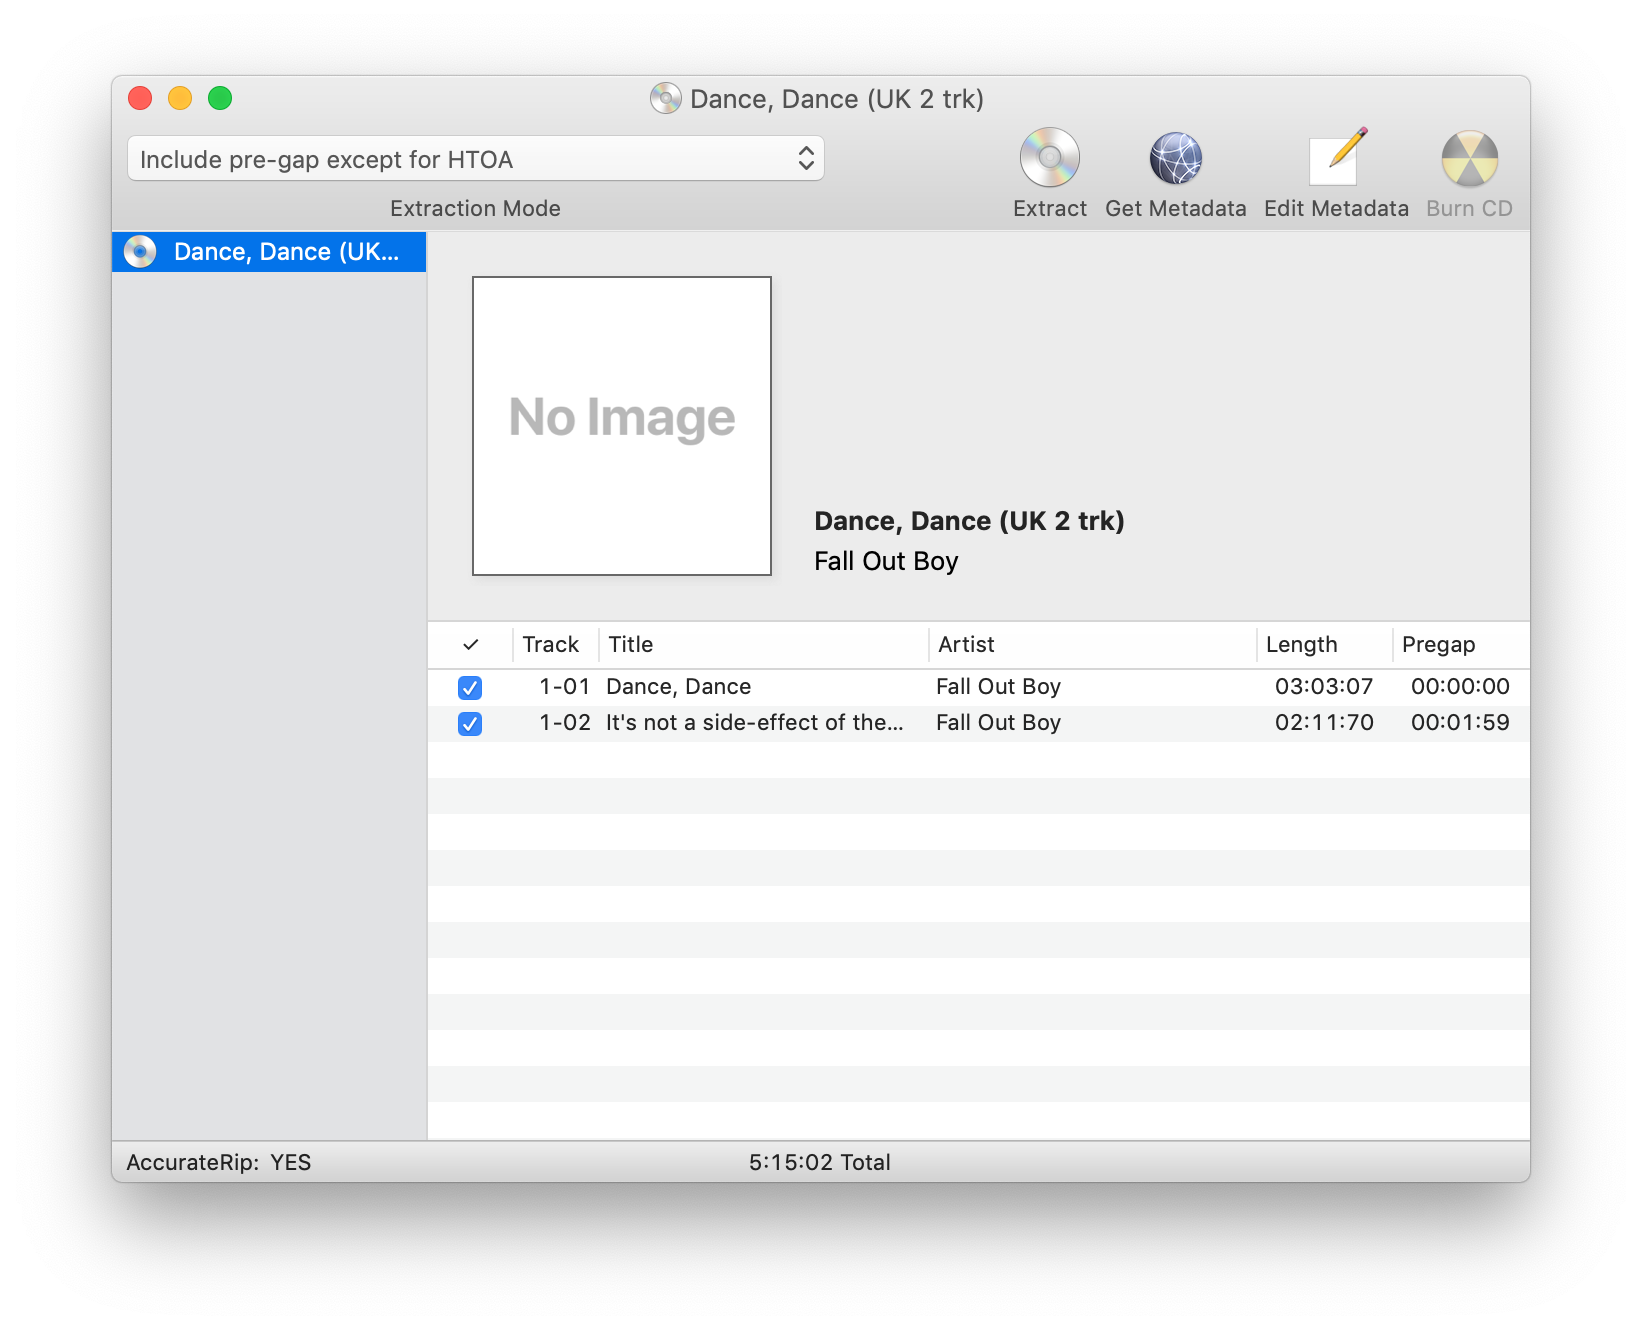
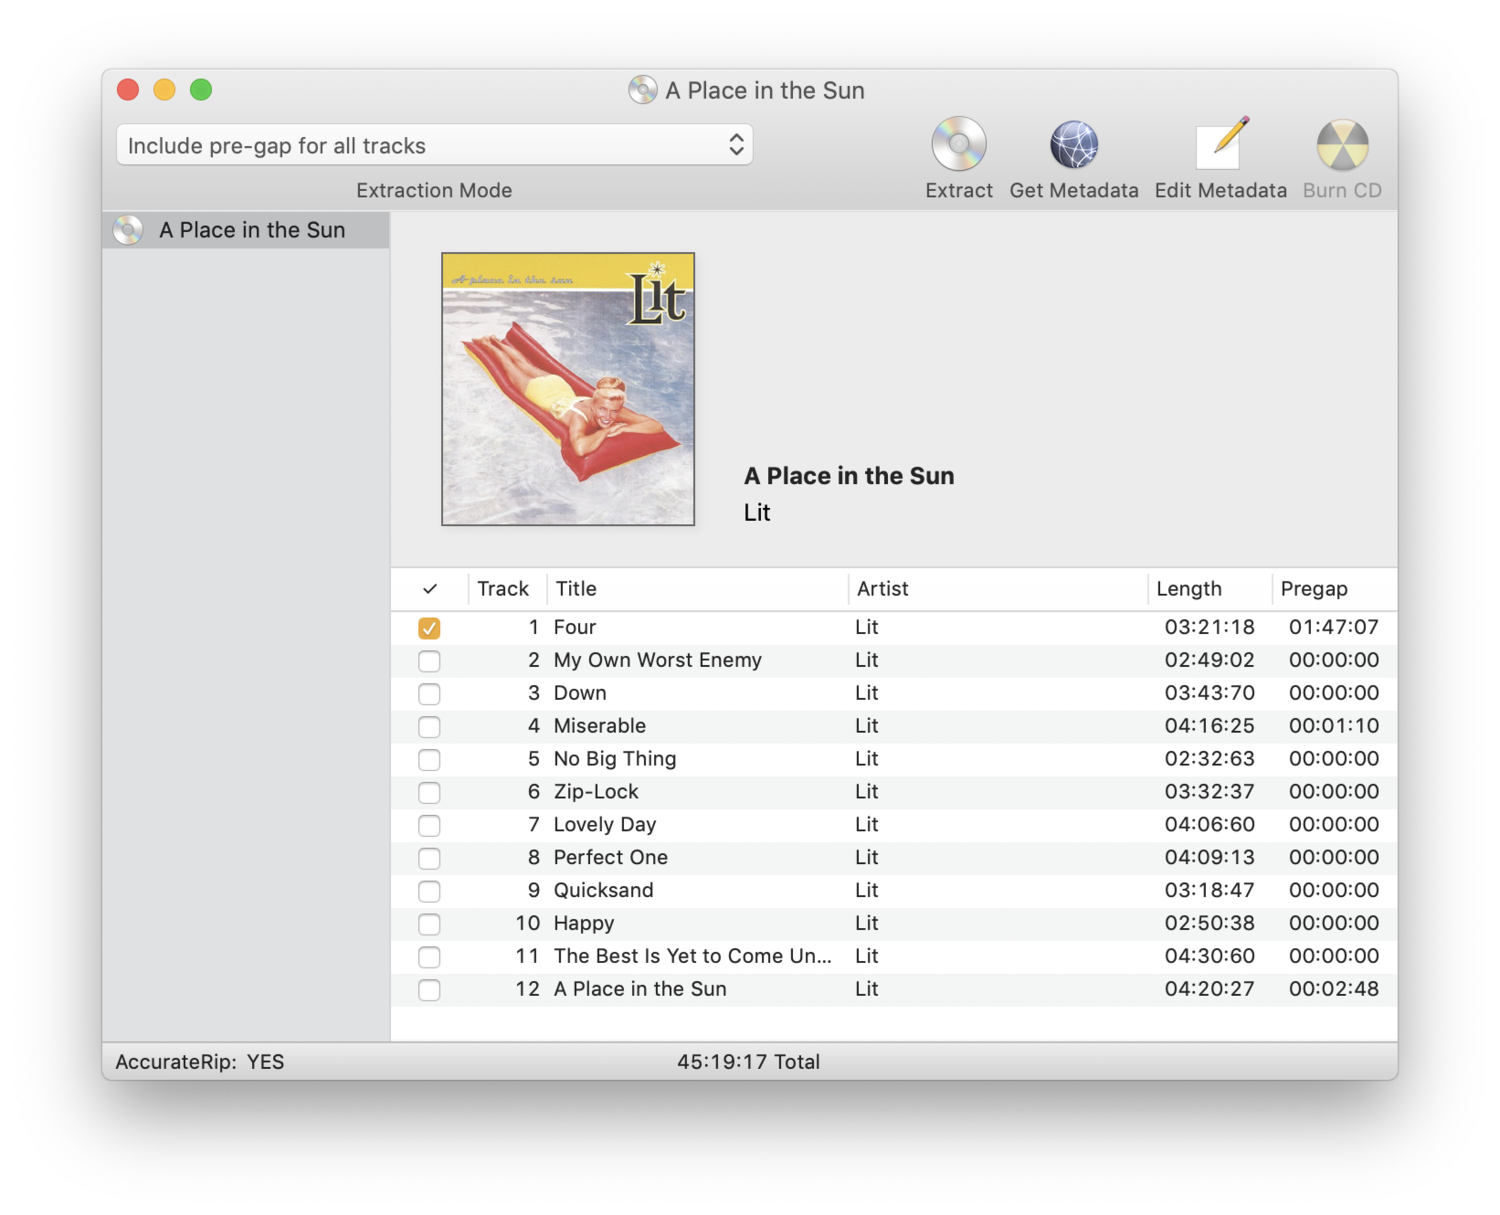
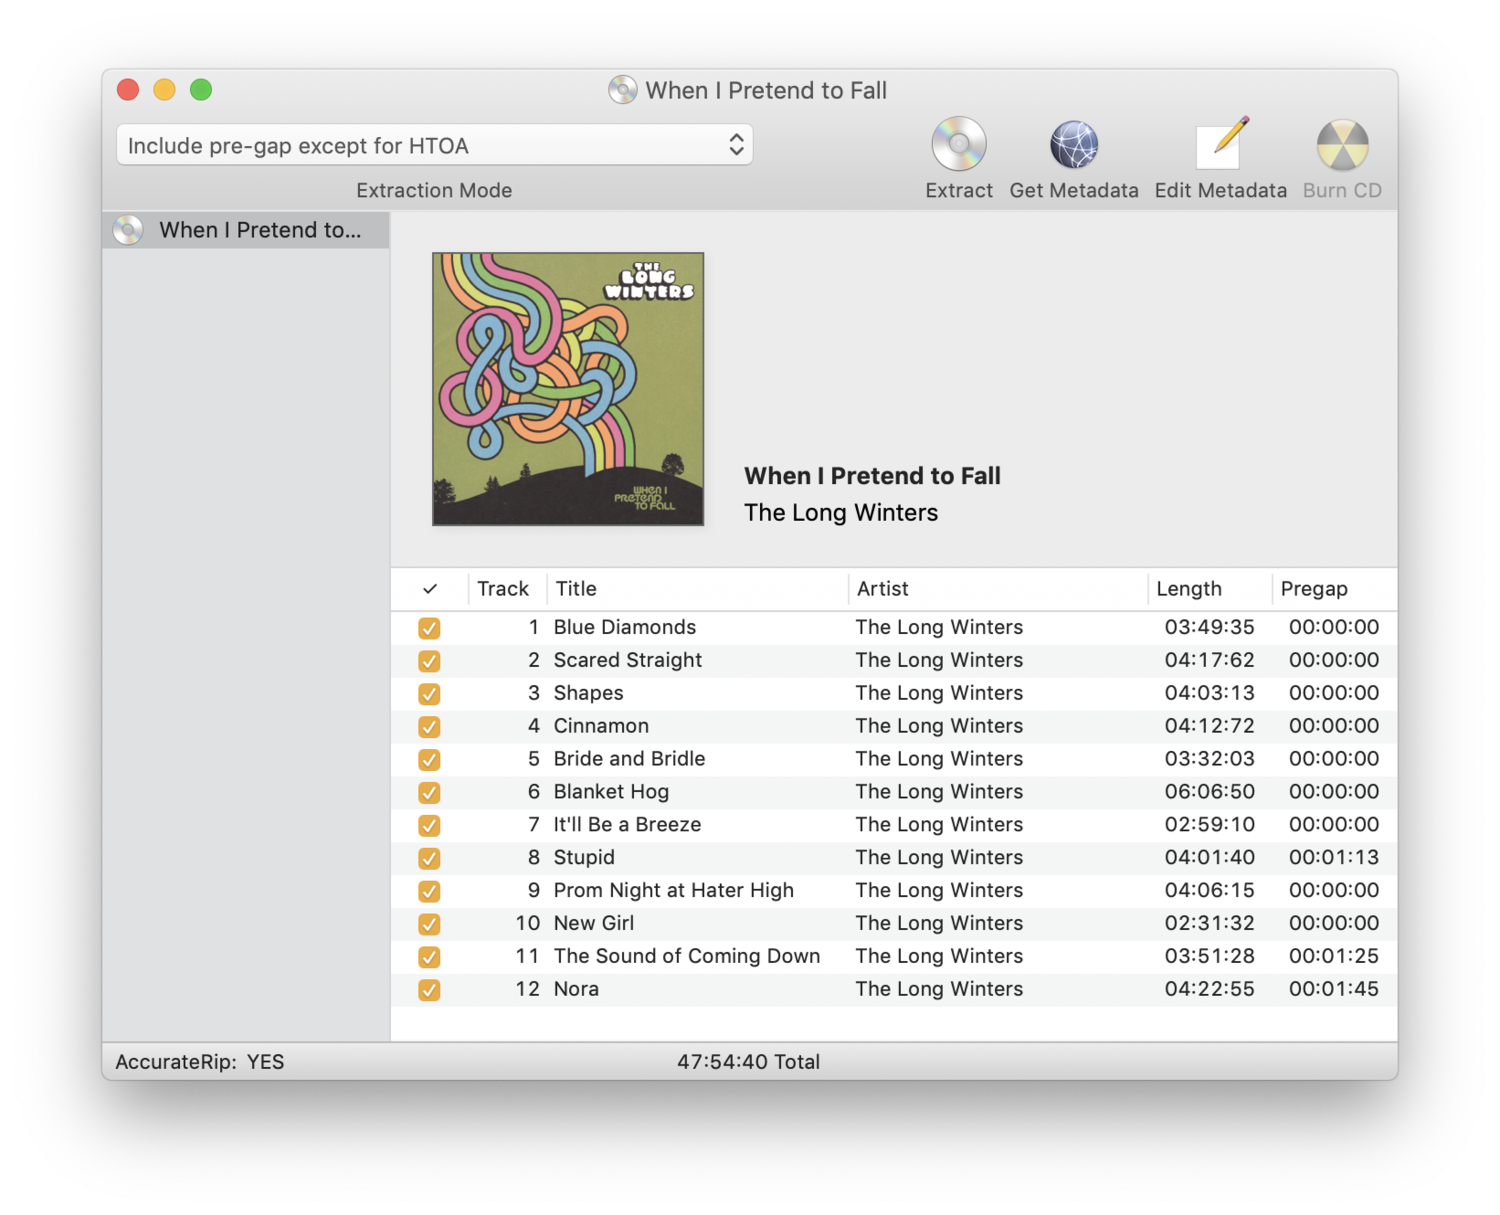
Now that you are fully configured, it’s time to rip a disc. Navigate to File > Open Audio CD from the menu bar. The submenu that appears should list the name of the CD in your drive. If it doesn’t, there is an option to refresh this list.
After detecting pre-gaps for your disc, the above window will appear with information about the disc. If the metadata isn’t pre-filled at this time, click “Get Metadata” from the list at the top right of this window.
On some releases, the full metadata may not exist in the databases XLD scans. If there is no album artwork, you can drag and drop a .jpg from your filesystem into the appropriate spot here. You can manually edit the rest of the metadata for one or more tracks by selecting them and clicking “Edit Metadata.”
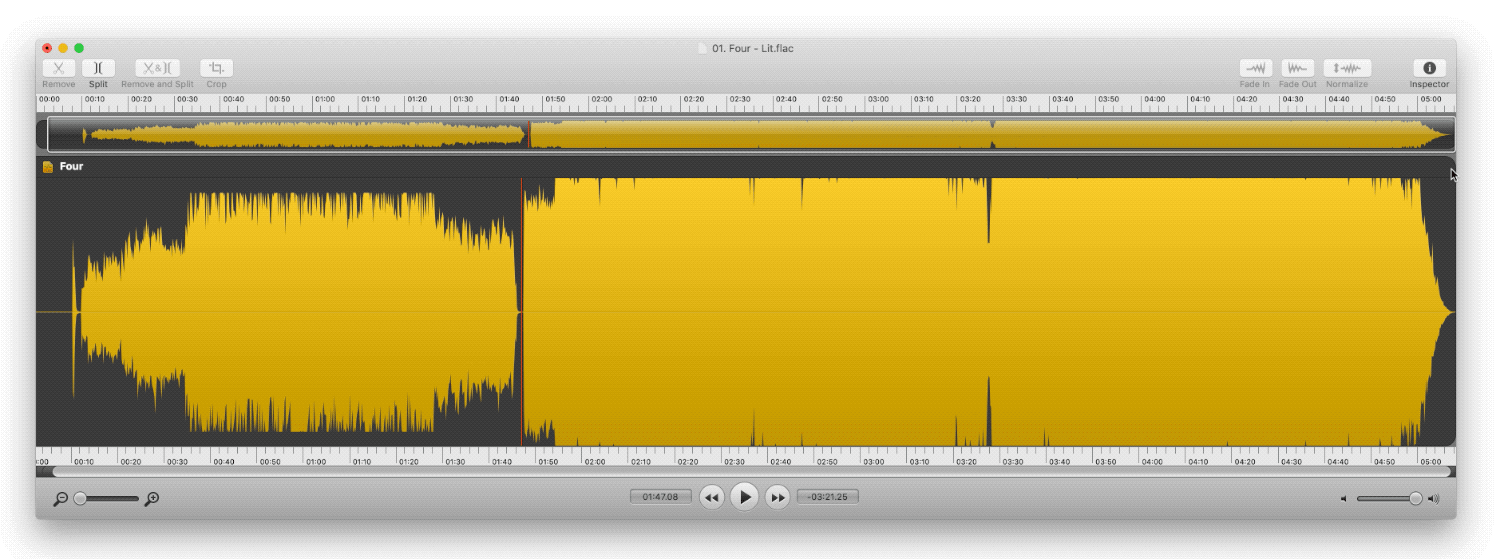
Before you extract the audio, note the pregap for track one. If this value is anything other than 00:00:00, there may be audio hidden in the pregap of track one. For more information on how to extract this, check out this guide.
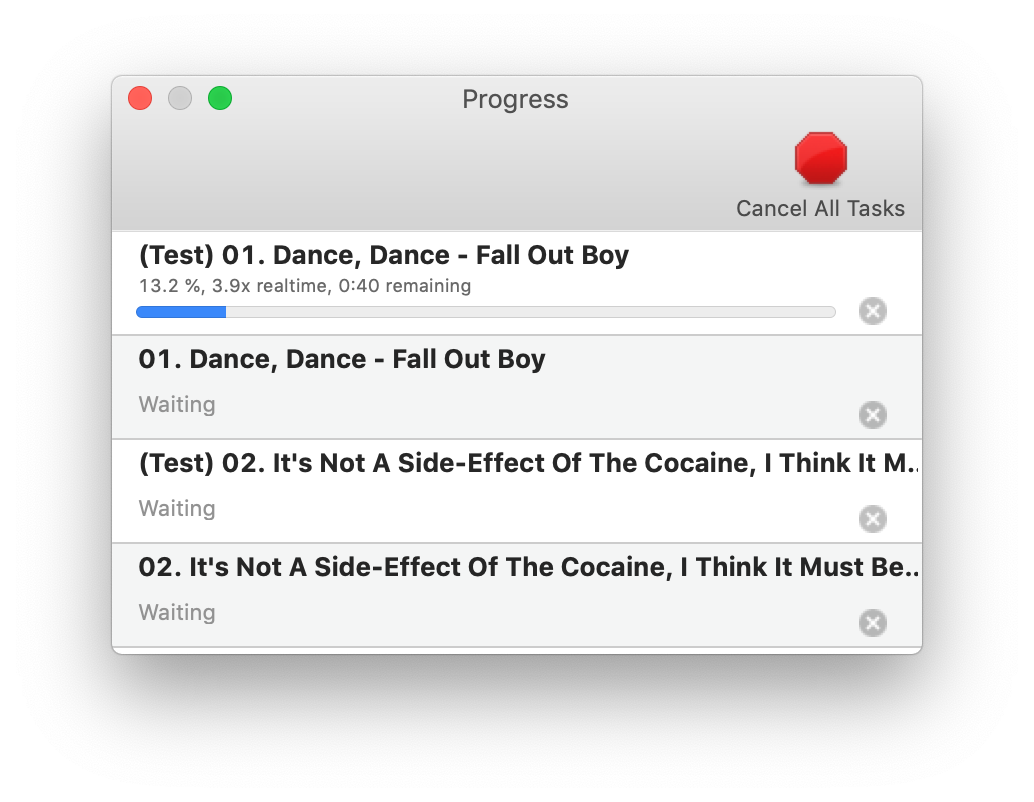
After clicking extract and setting the output directory, the ripping process will begin. Depending on your settings, the length/condition of your disc and the speed of your optical drive, this may take some time. A new window will appear so that you can follow the extraction’s progress.
Once the extraction is finished, another window will appear with a log file. If you used the configuration above, this has already been saved and you can close the window.
Plugins:
Now that you have your audio files and a log, you may want to check the quality of the rip. You can do this using a plugin called LogChecker.
To install, download it here and copy the XLDLogChecker.bundle file to ~/Library/ApplicationSupport/XLD/PlugIns. If this directory does not exist, create it. Restart XLD and verify the plugin by finding “Log Checker” in the XLD menu.
Once opened, the Log Checker window will accept log files by dragging and dropping. It will almost instantaneously check the log and show you the results. You want an OK from the Log Checker. If you get the “Not Signed” result, your rip has errors.
Errors that will require re-rips of affected tracks:
- Read Error, Damaged Sector Count
Errors you can ignore:
- Jitter error, Retry sector count
While configuring the CD Ripping settings, we told XLD to verify suspicious sectors. This setting will double check sections of the disc that initially appear to contain errors. If this setting is not set, the Log Checker will automatically deduct 5 points from its 100-point grade.